Switch to HTTPS Now, For Free

- SSL's not perfect, but we need to make surveillance as expensive as possible
- For privacy not to be suspicious, privacy should be on by default
- And hey, bonus: more complete referrer information in Google Analytics for people visiting from sites already using HTTPS (like Hacker News).
A quick overview: to use HTTPS on the web today, you need to obtain a certificate file that's signed by a company that browsers trust. Once you have it, you tell your web server where it is, where your associated private key is, and open up port 443 for business. You don't necessarily have to be a professional software developer to do this, but you do need to be okay with the command line, and comfortable configuring a web server you control.
Most certificates cost money, but at Micah Lee's suggestion, I used StartSSL. They're who the EFF uses, and their basic certificates are free. The catch is that their website is difficult to use at first — especially if you're new to the concepts and terminology behind SSL certificates (like me). Fortunately, it's not actually that hard; it's just a lot of small steps.
Below, we'll go step by step through signing up with StartSSL, creating your certificate, and installing it.
Register with StartSSL
To get started, visit their signup page and enter your information.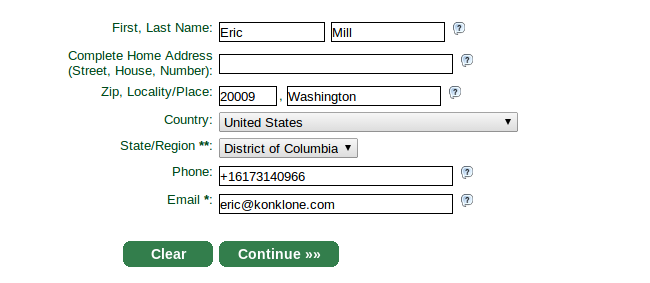

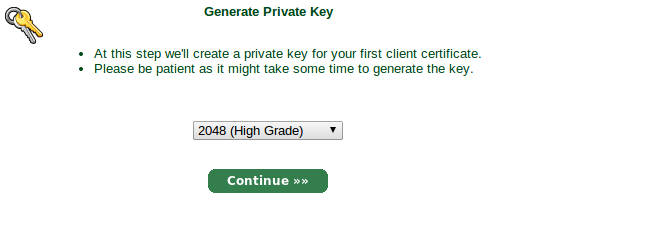
That'll bring you to a screen to generate a private key. Yes, they're generating a private key on their servers, but this doesn't have to be the key you use to make your SSL certificate. They're using it to generate you a separate "authentication certificate" that you will use to log in to StartSSL's control panel going forward. You'll make a separate certificate for your website later.

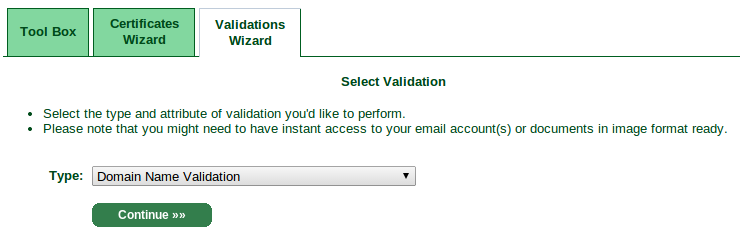
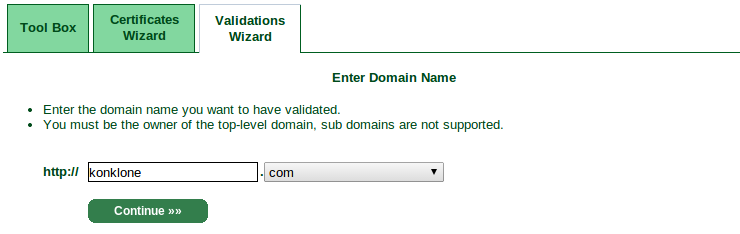
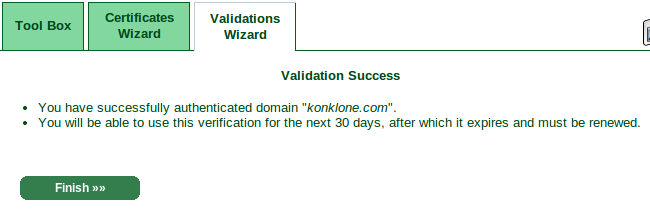
Now, we need to get StartSSL to believe we own the domain name we want to generate a new certificate for. From the control panel, click the "Validations Wizard" tab, and select "Domain Name Validation" from the dropdown.
As you can see, StartSSL will believe you own the domain if you control webmaster@, postmaster@, or hostmaster@ with the domain name, OR if you own the email address listed as part of the domain's registrant information (in my case, that's currently
konklone@gmail.com). Choose an email address where you can receive mail.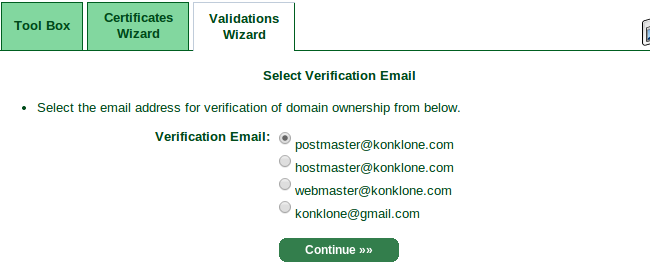
Generating the certificate
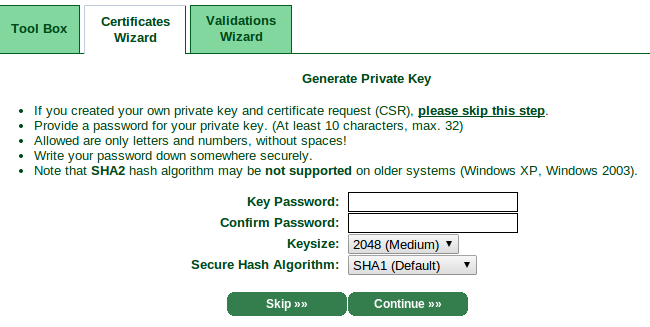
Now that StartSSL knows who you are, and knows you own a domain, you can generate your certificate using a private key.While StartSSL can generate a private key for you — and their FAQ assures you they use only the highest quality random numbers and don't hold onto the key afterwards — it's also easy to create your own.
This guide will cover creating your own via the command line. If you choose to let StartSSL's wizard do it, you can pick back up with this guide a couple steps down, where you choose the domain the certificate should apply to.
To create a new 2048-bit RSA key, open up your terminal and run:
openssl genrsa -aes256 -out my-private-encrypted.key 2048You'll be asked to choose a pass phrase. Pick a good one, and remember it. This is what will keep your private key secure if you ever transfer it over the wire.
This will generate an encrypted private key. The next step is to (temporarily) decrypt it so that you can generate a "certificate signing request" with it. To decrypt your private key:
openssl rsa -in my-private-encrypted.key -out my-private-decrypted.keyNow, generate a certificate signing request:
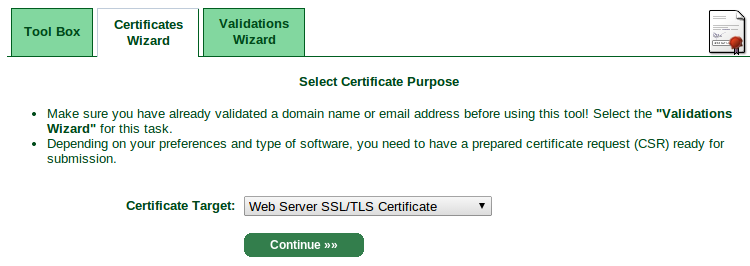
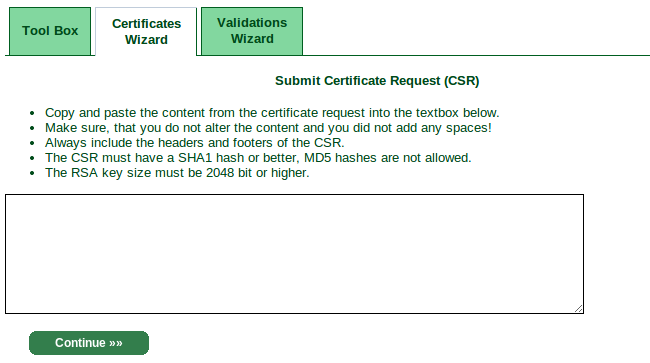
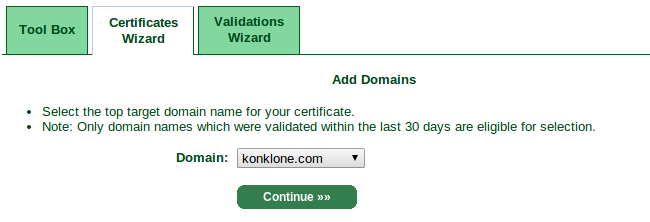
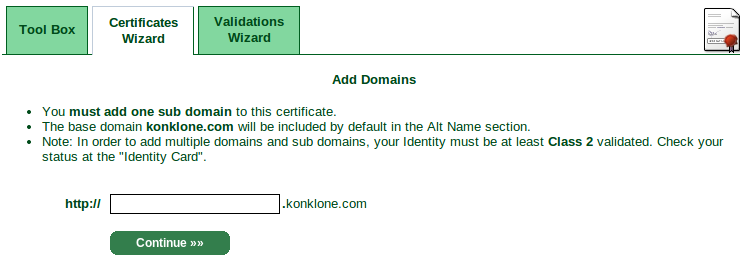
openssl req -new -key my-private-decrypted.key -out mydomain.com.csrGo back to StartSSL's control panel and click the "Certificates Wizard" tab, and select "Web Server SSL/TLS Certificate" from the dropdown.
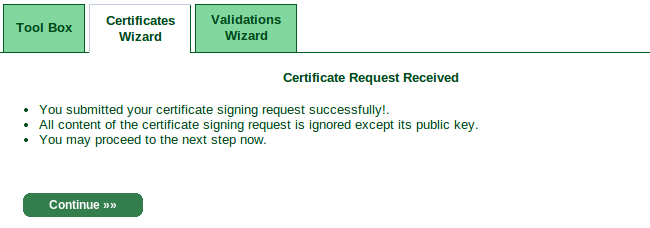

Note: It's possible you'll get hit with a "Additional Check Required!" step here, where you wait for approval by email. It didn't happen to me the first time, but did the second time, and my approval arrived in ~30 minutes. Upon approval, you'll need to visit the "Tool Box" tab and visit "Retrieve Certificate" to get your cert.
That should do it — your certificate will appear in a text field for you to copy and paste into a file. Call it whatever you want, but the rest of the guide will refer to it as mydomain.com.crt.Installing the certificate
First, make sure port 443 is open on your web server. Many web hosts automatically keep this port open for you. If you're using Amazon AWS, you'll need to make sure your instance's Security Group has port 443 open.Next, we're going to create the "certificate chain" that your web server will use. It's your certificate, and the signing authorities of the company that signed your certificate. Download the intermediate certificates from StartSSL:
wget http://www.startssl.com/certs/ca.pemwget http://www.startssl.com/certs/sub.class1.server.ca.pemThen concatenate them together:
cat mydomain.com.crt sub.class1.server.ca.pem ca.pem > unified.crtFinally, tell your web server about your unified certificate, and your decrypted private key. I use nginx — my nginx configuration, below, redirects all HTTP requests to HTTPS requests using a 301 permanent redirect, points the server to the certificate and key, and adds an optional header that tells browsers that the site is meant to only be viewed over HTTPS.
| 1 2 3 4 5 6 7 8 9 10 11 12 13 14 15 16 |
|
sudo nginx -tThen restart nginx:
sudo service nginx restartCross your fingers and try it out in your browser! If all goes well, the
will be yours.Mixed Content Warnings
If your site is running on HTTPS, it's important to make sure all linked resources — images, stylesheets, JavaScript, etc. — are HTTPS too. If they're not, users' browsers will complain. Newer versions of Firefox will outright block insecure content on a secure page.Fortunately, pretty much every major service with embed code has an HTTPS version, and most (including Google Analytics and Typekit) handle it automatically. For others, you'll need to figure it out on a case by case basis.
Back up your keys and certificates
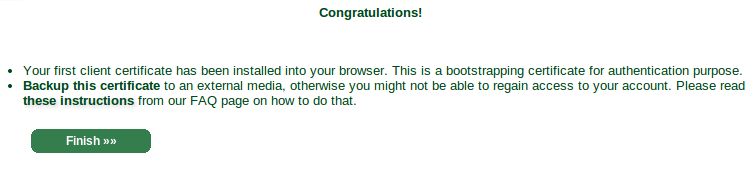
Don't forget to back up your SSL certificate, and its encrypted private key. I put them in a private git repository, and included a brief text file describing each other file and the process or command that created it.You should also back up your authentication certificate that you use to log in to StartSSL. StartSSL's FAQ has instructions — it's a .p12 file containing a cert + key that you export from your browser.
No comments:
Post a Comment